Field Shooting Positions
Field-Shooting Positions with Sticks that Expands your Hunting Limits
Story by Caylen Wojcik

The ominous and almost haunting realization that it’s the last day of the season hangs over your head as you make one last hike up to your glassing perch with hopes of catching a glimpse of the animals that have been so elusive in the preceding days. Hours pass, and in the fading light you glass across the sage into the glare of the sun. Catching some movement your eyes focus on an ear flick; low and behold it’s a shooter buck. He’s far, but your heart is soaring with the hopes of success as you range him before he feeds out of view into the dark timber just a couple dozen yards away. At 460 yards, your .300 WSM is more than capable, but you can’t lay down in the high sage, and the only shooting support you have is your pack and a set of Stoney Point sticks that you’ve used only once or twice. You know you can shoot that far, but only from a bench or prone. That elated feeling quickly drains as your gut tells you “No, you can’t make that shot,” and you watch what you thought was your buck walk away.

I know some of you are thinking, “460 yards off of sticks is too far, anyways; you shouldn’t take that shot even if you feel good about it.” How far is too far? The truth is range is just a number for a shooter who practices regularly. It’s as simple as “range, dial, hold for wind, and press” for someone who is confident with their rifle and, most importantly, their ability to apply the fundamentals of marksmanship in field conditions.
I routinely see students successfully and consistently hit targets at greater distances than the above scenario with a little bit of instruction and training. Now, let’s be clear; there is a big difference between training on steel targets that are stationary and a living, breathing animal.
It’s OK to miss steel, but as hunters, our quarry deserves the utmost respect with a quick and humane expiration from a well-placed shot.
With animals we play for keeps, and staying inside of your limits with a rifle afield should be our primary concern. So, how can we extend our comfort zone? How can we push those limits with confidence so we don’t have to see those bucks walk away? It’s going to take dedication and lots of time on the range. Here are some pointers on how to do it effectively:

The first thing we should identify right off the bat is what our rifle can do under ideal conditions. Spend a day with your rifle shooting it at distance and record your data. If you’re using hold-overs, that’s fine, make sure you write down the range to the targets and the hold you used to get center hits. If you’re dialing your turrets, record the turret settings it required to hit center. Ideally, you should do this from the prone position to remove as much shooter error as possible. This raw data you’re gathering is what you’re going to use to make your drop chart. It’s also going to build your confidence with the rifle, knowing that it’s going to do what you tell it to do, under ideal conditions. If you have the space available, this is also a great opportunity to push the limits of distance. You can do this safely knowing that misses are only going to result in creating a little bit of self motivation and not a wounded animal.


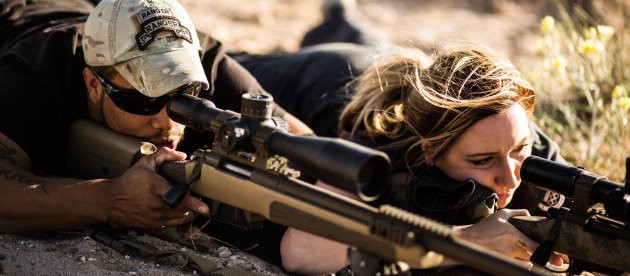
Once we know that the rifle is doing what we want it to do in a general sense and we’ve established that confidence, it’s time to get ourselves out of the prone and into field-shooting positions, and I mean a lot of different positions. We want to focus on the fundamentals of marksmanship, and accept nothing less than perfection.
The fundamentals in a nutshell are: creating a solid body position relying on either bone or artificial support, aligning our sights and aiming, proper breathing, getting a natural point of aim, trigger control and follow-through. It’s a lot to remember, but if you go about it in a systematic way by applying all those items in that order, your shooting will improve drastically.

The main thing to really focus on in field-shooting scenarios is establishing a natural point of aim. This is where the rifle wants to go in any given shooting position while the shooter is relaxed. Relaxation is key; we can’t relax without bone or artificial support, so make sure you’re honest with yourself when you build your shooting position. If you close your eyes, breathe and relax, the cross hairs should be right where you left them before you closed your eyes. If they’re not in the same place then you don’t have a natural point of aim, and you need to adjust your body to get the rifle to go where you want it to go. It takes lots and lots of practice.

When you head out to practice, focus on the tools you’re taking afield first, such as your shooting sticks or a tripod. Shoot from them in as many different positions as you can think of so you can identify your weaknesses and your strengths. Once that’s comfortable, move on to shooting off of weird things that could mimic field scenarios, like stumps, logs, branches and fence slats. You’ll be surprised at how effective you are after a little focused practice. You don’t need long ranges or steel either. If your range only has 100 yards, that’s fine, just shrink your target size. Start with 6-inch rounds or squares, then reduce the size as you gain confidence and proficiency. A good standard is a 3-inch target from 100 yards. If you can consistently place shots into that size target, you’re in good shape and are applying the fundamentals.

Putting everything together and building confidence in your rifle will translate into building confidence in yourself. It’s a great feeling going afield knowing that you’re prepared for a wide variety of conditions. Something else to consider is looking for outside instruction from a reputable and professional organization. Having a second set of eyes watching you and offering constructive criticism will pay off in a big way when you head off on your own. You’d be surprised what a couple days of instruction will do for your shooting. Training for field-shooting positions is easy and a fun challenge. Use your imagination and be creative. Bottom line: enjoy yourself! ASJ
Caylen Wojcik uses a 55-gallon drum as a support during the 2015 Sniper’s Hide Cup. Notice the points of contact on the shooting elbow, the chest and bipods – that’s solid contact. (JOSEPHAT OROZCO)
Here’s more from National Shooting Sports Foundation | NSSF


