
Solving the Sighting-In Puzzle
A Top-flight Shooter And Hunter Details How To Get Great Groups
KaBOOM…“$*@@!%&, $^&*@@!*^%#” came the expletive from the bench two down from mine. As the sound of his shot reverberated from the steel roof at the rifle range, I looked over at the shooter and saw him turn away from the spotting scope and jump up to start turning the adjustment turrets on his 3×9 Leupold scope. He had taken on what seems to be a daunting task to many shooters: zeroing, or “sighting in,” their hunting rifle.
It had started some 45 minutes prior when the gentleman arrived at the range and asked me to hold up shooting for a few minutes while he put up some targets at 100 yards. I opened the action of my Winchester Model 70 Long Range Hunter in .300 Winchester Magnum and waited while he went downrange. He placed four Redfield sight-in targets in a square on one of the backstops on the 100-yard line and returned to the benches where we agreed to commence shooting.
I fired the last shot of a three-shot group into one of my targets set at the 300-yard line. I was developing long-range loads and starting each group from a cold, clean barrel, which allowed ample time to observe the goings on next door. The shooting to my left continued as the wind started picking up, a common occurrence on ranges that are long (600 yards) and the morning sun starts heating things up. Fairly quickly my wind flags set at 100, 200, and 300 yards were all flying at different angles, making the process of load development even more difficult.

While waiting for all of the wind flags to be the same for each shot it began to occur to me how over my 35 years of shooting on this Alaskan target range, it has been much more common than not for people to have difficulty in zeroing their hunting rifles. Time after time I have watched folks burn up a box of ammunition and load their gear up in disgust only to see them back at it a few days later. It seems that the vast majority of hunters are not really “gun guys.” They utilize the gun as a means to an end – the taking of whatever game species they are after. Being a diehard hunter myself I can appreciate that. But being a die hard shooter as well, sometimes it is painful to witness the difficulties folks have over a very simple task.
 IT ISN’T ROCKET SCIENCE, if you know the particulars, but it is a bit of a science. There are a multitude of factors that must line up, sort of like the wind, the moon, and the sun thing. Fortunately in modern firearms virtually all of the issues of less-than-stalwart barrels, scopes that move after every shot, triggers that were much like dragging a concrete block across pavement, and factory ammunition that was sometimes a crapshoot are memories from the past. The average modern hunting rifle with a decent (read, moderately priced) scope is capable of shooting three-shot, 100-yard groups of 1½ inches, which is all you need for 95 percent of big game hunting. A 1½-inch group at 100 yards equates to a 3-inch group at 200 yards, and a 4½-inch group at 300 yards — plenty of accuracy to hit the heart-lung area of North American big game animals, with a little margin for error at 300 yards.

Experienced hunters know that taking shots beyond that is rare and ill-advised without a lot of wind-reading knowledge or perfect conditions. With that, if you do not have a correct zero for the ammunition you have chosen, it is still the proverbial shot in the dark. For the sake of argument, let’s assume you have a brand-new Winchester M70 Featherweight chambered for .30-06 with a Burris Full field 2×7 scope that was bore sighted by the dealer upon purchase.
Before hitting the range there are a couple of details that will save you time and expended ammunition. Check all of the screws on the entire assembly. Loose action or scope mount/ring screws are a common culprit of the rifle that “just won’t shoot straight.” Clean the bore with a brass brush and some Hoppe’s No. 9 (being an old-timer, I still love the smell of the stuff) or any other good gun-cleaning solvent.
 Run dry patches down the bore until they come out clean. The reason for cleaning a brand-new rifle is some manufacturers swab the bore with a heavy grease to prevent rust during transit, and even in today’s environment of hot gun sales, who knows how long the weapon has been sitting on the dealer’s shelf. One patch with a very light oil finishes the job for a hunting rifle (if your rifle has a chrome-lined bore, the oil patch is not required). This heavy grease, if left in when the rifle is first fired, can create accuracy issues that can never be resolved.
THIS REMINDS ME OF a time some 30 years ago when a buddy wanted to go black bear hunting. I agreed to take him to a favorite spot as he had never taken a bruin. So confident was I that I didn’t take my rifle, only a .44 as I was going to be the packer. We arrived at a meadow that always greened up early in the spring and where I had seen and taken black bears in the past. In the predawn light a really nice one came out about 200 yards away. It was a chip shot for my friend’s brand-new .300 Weatherby with a Redfield 4×12 scope. “Take him,” I mouthed to him. He whispered back in my ear, “I think he is too far; you shoot.” I took the Weatherby and silently chambered a round. “What is it zeroed at?” I asked. He looked at me with a blank stare and I slowly opened the bolt. We watched as the bear fed and then disappeared back in the brush. Later we took his rifle to the range and found it to shoot a bit over a foot high and 8 inches to the left at 100 yards. Well, at least it would have been a clean miss at 200. Unbeknown to me, he had bought the Weatherby, had the scope mounted and had never fired it. He had no idea how to zero it.
TO THE RANGE, WE go, with the ammunition of your choice. A way to save a few bucks is to use less expensive ammo of the same weight bullet for getting the rifle close, and then using the premium stuff for the final zero. You will also need some sort of front and rear rest for steadying the rifle on the bench. The commercially available rests — Caldwell seems to be the most prolific, and available at the moment — all work well and provide a bit better control than sandbags or a jacket thrown over a backpack. Ideally, your rest set-up allows you to adjust so the rifle sits in the bags, cross hairs on the target with very little movement to center it perfectly. Whatever you use, be sure there is some sort of cushion for the forend. Laying the forend on a solid surface will cause a “bounce” effect that changes the impact.
Some targets, stapler or thumb tacks, and eye and ear protection round out the rest of the required items to get this job done. There is a huge array of targets available; pick what looks good to you. I am partial to Redfields. They are easy on the eye and fairly easy to see bullet holes with. A spotting scope is nice, and good binoculars can also be helpful and will save some walking, but are not absolutely necessary. Save yourself some frustration and set up the first target at 25 yards on a 2-foot-by-2-foot or larger piece of cardboard, preferably at a level about even with the top of the bench or rest you are using. The reason for this is that bore sighting is a less-than perfect science, and as often as not, won’t put you on paper at 100 yards.

Starting at 25 yards with the large cardboard virtually guarantees you will have a bullet hole somewhere on paper with the first shot. A word on range etiquette where there are others shooting. Set up your rests and the rest of your equipment first. Come to the firing line with your action open, muzzle up and lay the rifle in the rests, muzzle pointed down range. If there are shooters downrange checking/changing targets, wait until they are all back and behind the firing line before you bring your gun up. While you are on the range, anytime there are shooters downrange doing anything, open your action and do not touch the gun until everyone is back behind the firing line. These are good rules to remember if there isn’t a range master on hand to bark back at you.
Now with the rifle on the rests, sit down behind it and get comfortable. Looking through the scope, find the target and adjust your rests so the rifle is basically sitting by itself, cross hairs on the target. Shooting from a bench rest is a bit different in that you do not hold the for end with your support hand at all. You grip the rifle with your shooting hand and place your support hand around the base of the rear bag. Pull the butt stock to your shoulder; how tight you pull it depends on the recoil intensity of the cartridge: the more the recoil, the tighter the hold. With your support hand, squeeze the rear bag to adjust the elevation of the cross hairs on the target.
AND SO THE SHOOTING begins. Load a cartridge in the firing chamber and center the cross hairs as previously described, then slowly press the trigger until the rifle fires. Now, there are all sorts of ways to describe how a trigger is pressed; some are right, some are not. The best way I have found to describe this is to “let the gun go off, don’t make it go off.” When you make it go off, that implies a jerk of the trigger, which results in errant shots that are not representative of where the rifle is actually shooting. Even in high velocity cartridges where the bullet exits the barrel in excess of 3,000 feet per second, the movement of a jerk from the trigger will show up on a target. The longer the “barrel time” – that is, from the time of ignition until the bullet exits the bore – the greater impact this has.
Jerking the trigger is most often caused by recoil or more aptly, the fear of recoil. If you think about it, who wouldn’t be a bit apprehensive about having something blow up in their face and hit them hard in the shoulder? For folks who didn’t grow up with it, it is a difficult thing to overcome. Over the years I became a national-caliber benchrest shooter and silhouette shooter, and I developed a lust for shooting heavy-caliber rifles. Anything from a .375 Holland & Holland on up I loved to shoot. These heavy rifles had an intrinsic accuracy, not bench rest-winning quality, mind you, but their hunting accuracy was virtually unfailing. And, as the late great Warren Page said, “only accurate rifles are interesting” they intrigued me. The only heavy rifle I ever shot that wasn’t at least hunting-accurate was the Wesley Richards .450×3-inch Nitro Express double rifle once carried by John “Pondoro” Taylor, of African elephant hunting fame.
This gun, marvelous as it was in its glorious history, would not hit the proverbial bull in the ass reliably at 50 yards. For their size, it’s pretty tough not to hit a pachyderm at that range. On the other hand, the most accurate out-of-the-box heavy rifle I ever fired was a .460 Weatherby. The owner was set to go to Africa and hunt Cape buffalo but had a shoulder injury. He wanted me to make sure the rifle was zeroed without him further injuring his shoulder before his trip. I set this beautiful rifle up on the bags and on the fifth shot, two things happened. The first — and to me, the most important — was the completion of a ragged five-shot group at 100 yards that could be covered with a quarter. The second — and most important to the owner — was that the stock split down the center, from the forend to the pistol grip.
 ONCE THE FIRST SHOT is fired and you have located the bullet hole, you can start the scope adjustment process. Most scopes have ¼ minute-of-angle (MOA) graduations, or “clicks.” For argument’s sake we’ll say your initial bullet impacted 5 inches high and 2 inches to the left. At 25 yards, those ¼ minute (read, ¼ inch) adjustments move the point of impact a sixteenth of an inch. That means moving the elevation adjustment 80 graduations or clicks down and the windage adjustment 32 clicks to the right.
Translated to 100 yards, that first bullet would have impacted 20 inches high and 8 inches to the left, easily missing the typical sight-in target. Make your adjustments and fire another shot, which should be reasonably close to the center of the 25-yard bullseye. Now focus on the 100-yard target. Shoot one shot, which should be reasonably close to the bullseye. Now think about where you really want the bullet to impact at 100 yards to take advantage of the .30-06 trajectory. Assuming a 180-grain bullet, a 200-yard zero is reasonable and thus a bullet impact of 2 inches high at 100 yards is going to generally be correct.
For the hotter big-game cartridges such as the 7mm Remington Magnum and the .300 Winchester Magnum, using 160-grain and 180-grain spitzer shaped bullets, a 3-inch-high, 100-yard zero puts you dead on at 300 yards. Whatever zero you decide, make your scope adjustments accordingly. If the bullet impacted 5 inches high and 3 inches to the left, assuming ¼-minute adjustments, move the elevation adjustment down 12 clicks or graduations (3 inches) and the windage adjustment 12 clicks (3 inches) to the right.
Before your next shot, let the barrel cool down. Oftentimes, even with the superbly accurate rifles, the cold barrel shot impacts differently than subsequent shots. For a hunting rifle the first shot is always going to be a cold-barrel shot, and however that works out, you want your zero to be spot on with that one. Fire the cold barrel shot, mark it no matter where it hits and let the barrel cool again. Fire the second and repeat. Opening the bolt to allow air to circulate quickens this process. Fire the third shot, and taking the three shots as a group, make your final adjustments based on the center of that group. What so often happens with sighting in rifles is that hunters will try to get that perfect center-bull shot, and in doing so, make a scope adjustment after every shot. One must accept that if the rifle shoots 1½-inch groups, the bullet may impact ¾ inches high or ¾ inches to the right of that “perfect” zero.
RIFLE ACCURACY IS A product of uniformity and consistency. The ammunition used must be put together with enough uniformity to shoot accurately. Bullets must weigh the same and be seated the same, powder charges be uniform and the brass used must be consistent on the inside and well as the outside. Back in the day when I shot bench rest matches, the brass case was one of the most consistent culprits of poor accuracy. The concentric of the neck, which aligns the cartridge in the chamber, was routinely out of round. Out of 20 cases, one would be lucky to find five that were bench rest quality. Shooting the rifle must also be consistently the same. When you sit and wrap yourself around the rifle, do it exactly the same each time.
The pressure you are applying to the butt stock/shoulder junction needs to always be the same. If you hold it tight on one shot and loose the next, the impact on the target is going to be different. A hunting rifle doesn’t need to shoot sub-¼-inch groups, but when establishing the zero, you still want to take out as many variables as possible. Virtually all modern scopes of reasonable quality are set to be parallax free at 100 to 150 yards. Parallax is a condition where one looks through the scope at an object and by moving the eye position the cross hairs appear to move across the object. The lower the magnification, the less of a problem this is. High power scopes that are used at long range will have adjustable objective lenses or they may have a parallax adjustment on the left side of the scope opposite the windage adjustment. This enables the shooter to adjust for long ranges where even a slight misalignment of the eye with the scope could result in a miss. So long as the eye is centered precisely in the scope, parallax is not a factor. For the sake of normal hunting rifles with moderate-powered scopes, it is not of great concern, but nevertheless, one should still try to center the eye on the scope to minimize any affect it may have in zeroing the rifle.

AFTER MORE CURSING, THE shooter two benches over came over to me and struck up a conversation, explaining that he was having a real problem with getting his .300 sighted in. We looked at the target he had been shooting and determined that he had in fact been “chasing” the bullet holes around the bullseye. There was no discernible parallax in his scope, and the screws holding the package together were tight. An adjustment followed by one shot, then another minor adjustment followed by three shots into a nice 1¼-inch group 3 inches high ended the swearing, and my new found friend was on his way, a happy hunter.
It really is a fairly easy science to understand once you know the particulars, and as in so many things regarding the hunting/shooting world, folks are not born with any of this knowledge. There is nothing to be ashamed of in simply asking for a bit of advice to further one’s endeavors in the hunting arena.
AmSJ – Editor’s note: Steve Meyer in addition to having been a top-flight shooter, the author is a retired SWAT team leader who lives on Alaska’s Kenai Peninsula.
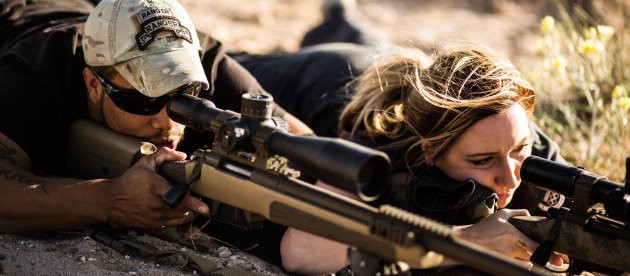
Bridging the Gap between a Sniper and Olympic Shooter
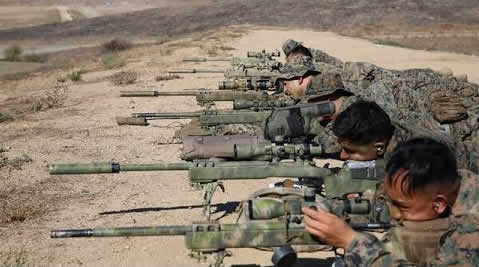
Snipers on their Job
