How to Zero a Rifle Scope
Rifle scopes have reached a point where they are more popular than ever before. Rifle scopes are used by hunters, tactical shooters, and even people looking for a rapid use home-defense optic and especially tactical rifle enthusiasts looking to find the perfect optic for their AR-15. With optics becoming more and more popular, it’s important to know how to zero a rifle scope.
There are many, many different kinds of scopes out there. This guide is designed as a general guide for zeroing a rifle optic. Some scopes may require very specific instructions on how to zero them.Whenever in doubt, refer to your scope’s actual instruction manual. Most scopes will fall into this guide when it comes to zeroing an optic, but there may be small detail changes. This includes particular ranges, or particular loads the rifle scope is supposed to be using.
INSTALLING YOUR RIFLE SCOPE
While this isn’t a guide on how to install a scope, it is incredibly important that your scope is installed correctly. If the scope is not correctly installed it can be impossible to zero. Depending on the scope rings or mount setup, the installation may be slightly different for each scope. Always follow the manufacturer’s directions.
For a typical variable magnification scope, the use of scope ring or a single piece mount is most often required. Any mounted scope rail needs to be tightened to the receiver and Loc Tite should be applied. The scope rings or mount should be mounted to the rifle and it must be secure.
The scope mounting system needs to be tightened down until it doesn’t move if the mount uses traditional screws. Traditional screws will most often require the use of substances like Loc Tite to make sure the scope rings or scope mount does not become loose from recoil when firing a rifle.
If the mount or rings utilize a QD mount, it needs to be locked tight and fit the scope rail appropriately. The scope should be positioned to ensure that the scope has correct eye relief. Correct eye relief should be listed in the instruction manual. For holographic scopes, the eye relief will not matter as much as it will when installing a scope for a rimfire rifle.
The reticle of the scope should be positioned so the scope is level. The vertical crosshair should be perfectly up and down. This will ensure the scope is perfectly level.
SELECTING THE RIGHT AMMUNITION
When you zero a scope to a rifle, you are also zeroing it to a specific type of ammunition. This is called a load, and factors that change a load include overall length, bullet weight, velocity, and projectile type.
Once a scope is zeroed to a certain load of ammunition, this load will be the most precise for that scope. Other loads of the same caliber may cause slight variations in accuracy. These variations are typically small and only make a significant difference at long range, or when measuring groups with precision devices.
For hunters and precision target shooters with variable scopes it is best to choose one type of ammo and stick with it while hunting or target shooting. For scopes like red dots, these variations between ammunition will hardly ever create a noticeable variation in accuracy.
SELECTING THE RIGHT TARGET

You can zero a rifle with almost any target. The easiest targets to use are targets that are designed for bull’s-eye shooting and are divided into grids. These grid boxes are most commonly a square inch.
This allows the shooter to easily adjust the scope based on how many inches it is away from the bull’s-eye. These targets are very common and easy to find in sporting goods or gun stores. When hanging the target, it is a good idea to use a larger piece of material behind the target.
This material is best often left blank and allows for shooters to see if they are hitting off target. Simple pieces of cardboard work well as backing for a target.
DISTANCE & SETUP
Once your target is established, back up to roughly half the distance you plan on shooting the rifle at. At half the standard range, a shooter can easily adjust their rifle on target before moving back to their normal firing range.
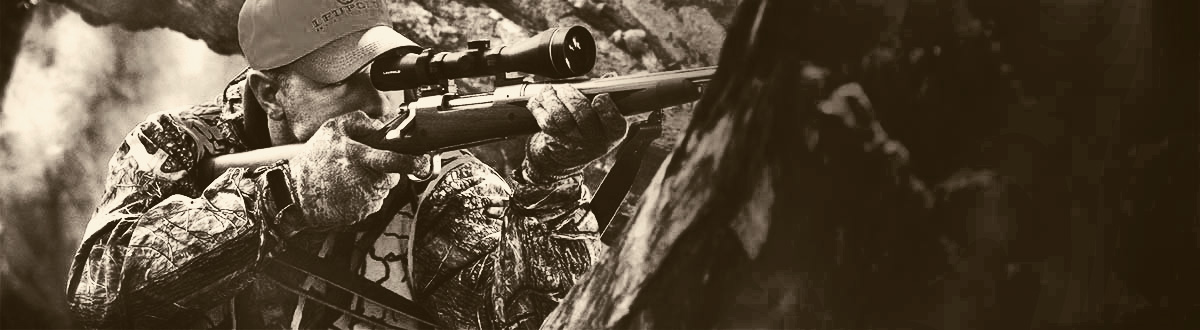
From here you’ll set up your shooting position. The most precise and accurate method is using a bench rest and a sled or a gun vise to secure the weapon.
This takes the human element out of zeroing the scope and stabilizes it as close to perfectly as possible. Alternatively, a shooter can set up behind a rifle in the prone position, with sandbags or a bipod to aid in stabilizing the rifle.
Regardless of your method of shooting, stabilization is the most important factor. To correctly zero a rifle and scope, shooters need a stable platform to shoot from.
BEGIN THE ZEROING PROCESS
Once a shooter is in position, they begin the zeroing process. For bolt actions, single shots, and AR-style rifles, the shooter can remove the bolt, and separate the action and look down the barrel. Shooters then adjust the weapon until the barrel is in relative line with the target.
The shooter can gaze through the barrel, and then the scope. If the scope is significantly off of the target, the view between the barrel and scope will be significantly different.
Other rifle designs are more difficult to remove the actions and impossible to look through the barrel. For these rifles, shooters can utilize a laser bore sight. This device fits into the chamber of the weapon and sends a laser directly down the barrel.
A shooter can adjust the scope until the reticle covers the laser on the target. This method can be used with any rifle, and is a very effective way to aid in zeroing an optic. This helps the shooter reduce the time and ammunition needed to zero an optic.
These devices are quite affordable, and easy to both find and use.

PREPPING FOR RANGE HOT
Once a shooter has gotten their reticle as close as possible to being on target, it is time to go hot. When zeroing a rifle scope the best practice is to take the necessary time to do it correctly. Apply the fundamentals to each and every shot taken.
Load and fire three rounds without making adjustments, or moving the target or rifle. Once the three shots are fired, unload the rifle, and ensure the action is opened. Once this is done, move on down range to the target.
Inspect the target. Your three shots are your “group.” This group should share some relatively similar characteristics.
These three shots should all be in one general area of a target. For example, the three shots may not be right on top of each other, but are all left and low of the bull’s-eye. If the three shots are randomly placed both high and low or both left and right, or any variation of this, there is an external issue.
This issue can be connected to fundamental skill issues, the method your scope is attached to the rifle, the method the weapon is stabilized, or an overt and odd ammunition issue. If this is the case, the shooter needs to reevaluate their rifle, ammunition, scope and skills.
FINE-TUNING THE ADJUSTMENTS

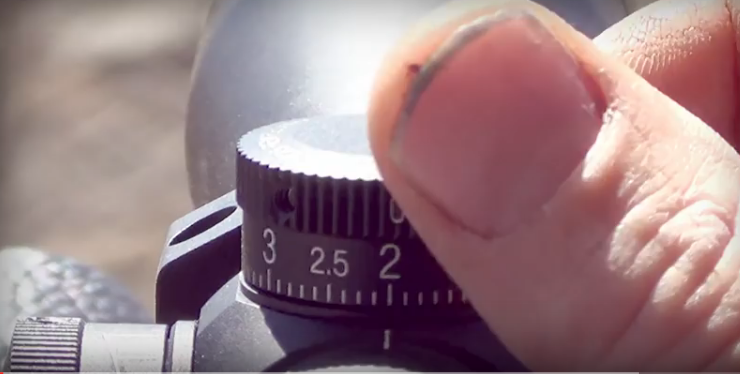
If the group is routine, the shooter should measure, and then apply those measurements to their rifle scope turrets. Turrets are different from scope to scope and turrets feature different adjustment measurements per click.
Turrets adjust the reticle up and down and left to right; this allows the scope to be aligned to where the rifle is shooting. This measurement will correspond to distance moved on the target.
Repeat the process of shooting three rounds and adjusting the scope until it is striking the bull’s-eye of the target. Once this is complete, place a new target on the target holder and shoot three more shots to confirm the zero.
Check out these Cool Gun Safes Click HERE to Check it out.

Once the shooter confirms his or her zero, they should move to the range they expect to be shooting at. Once at this range, the shooter should clean their bore at least one time. Shooters should ensure the weapon is clear and then run a boresnake or punch rod with brush through the barrel to clean it.
THE FINAL ZERO
The shooter should then shoot three shots and observe where it strikes on the target. When safe to do so, they should repeat the process of zeroing their rifle by making adjustments, and firing. Shooter will then repeat this process until the rifle is zeroed at this range.
A shooter can then call it a day, pack it up and go home. Alternatively, they can move the target or themselves back even further and zero the rifle to ensure it is accurate at ranges beyond what the shooter expects.
This is optional, but can be very handy in unplanned situations.
FINAL THOUGHTS
Zeroing a rifle to a scope is an absolute necessity. The more time a shooter takes and applies the fundamentals, the more precise their scope will be. Every step should be done appropriately, from setting the scope on the rifle, to securing the rifle into a stable firing position.
Skipping any step, or being lazy about it, will result in frustration at best, or a poorly zeroed rifle at worst. Shooters should take their time, be safe, and always double check their zeroes.
Here’s another look from Youtuber Rated Red
Editor’s note: Chris Frenchak is a firearms enthusiast and gun collector. He has a number of guns, like his AR-10 or M&P 9mm that he shoots regularly. He is a firearms hobbyist and has been adding to his firearms collection for over 20 years. He is also the lead editor at GunBacker.

Leupold VX-6 HD Multi Gun Scope

Vortex Viper PST 2.5-10×32 FFP